DIY | Holiday Inspiration
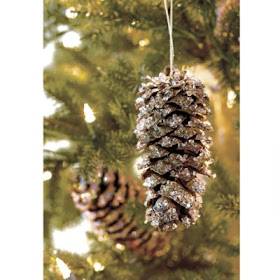
I know I have told you before I have a thing for pinecones, so when I say these lovelies at Ballard Designs I knew I wanted them! But, I thought "I can make these".
So, here are the supplies you will need:
- Martha Stewart Smoky Quartz Glitter
- Silver Glitter
- Glue (I used Aleene's Original Tacky Glue)
- Pinecones
- Ribbon
- Hot Glue Gun
I started by putting on the glue (I pulled out a brush, but it was just as easy to use my finger).
I then sprinkled on both kinds of glitter.
I then let everything dry for a few hours.
Once dry, I hot glued a ribbon hanger to each pinecone.
And viola! I had everything on hand, so these bad boys were free! I think these would also be great without the ribbon and simply stuck into a garland or any holiday arrangement. And you could really use any color glitter (you could even add really small beads for a chunkier look) and any ribbon you have on hand.


Very cute, wish I had access to free pine cones to make some of our own! (That is one thing I never see here, pine cones.)
ReplyDeleteThose are super cute! I've been wanting to do a natural looking Christmas tree for our basement and these would be perfect.
ReplyDeleteI'm not a very good crafter but this is calling my name - now I just need to find some pinecones! Very nice! Happy Monday!
ReplyDeleteTotally loving these girly! So simple and elegant! Thank you for the tutorial!! I'm going to have to whip some up for sure! :D
ReplyDeleteHave a great day!!
~Terrell @ Frou Frou Decor~
Totally going to do this tonight! LOVE LOVE LOVE!! :)
ReplyDeleteThey look beautiful! Thanks for the tutorial.
ReplyDeletelove the blog! i added yout linky button to the bottom of my blog!
ReplyDeletebloggingbypictures.blogspot.com
These are so pretty. Thanks for the DIY... and the glitter color names! They would be so pretty tied on a package wrapped in kraft paper or vintage music.
ReplyDeleteHmmm. I think I have to add these to my to do list! :)
ReplyDelete